Note: Local Check Printing option must be turned on by OmegaFi. If you do not have the ability to print local checks, please contact OmegaFi to update the necessary permissions.
All chapters must purchase check stock from OmegaFi to print local checks. Please contact OmegaFi to place your order.
________________________________________________________________________________________________________________
To print a check, the appropriate Bill Pay fund’s available balance must be equal to or greater than the amount of the requested check.
- To view the available balance in a fund within Vault, select the Bill Pay tab and then select Registers from the Manage Payables menu.
To create a check:
- Select Payments within the Manage Payables menu.
- Click the Add button on the right side of the Payments page.
- Choose Bill, Refund or Reimbursement from the available options.
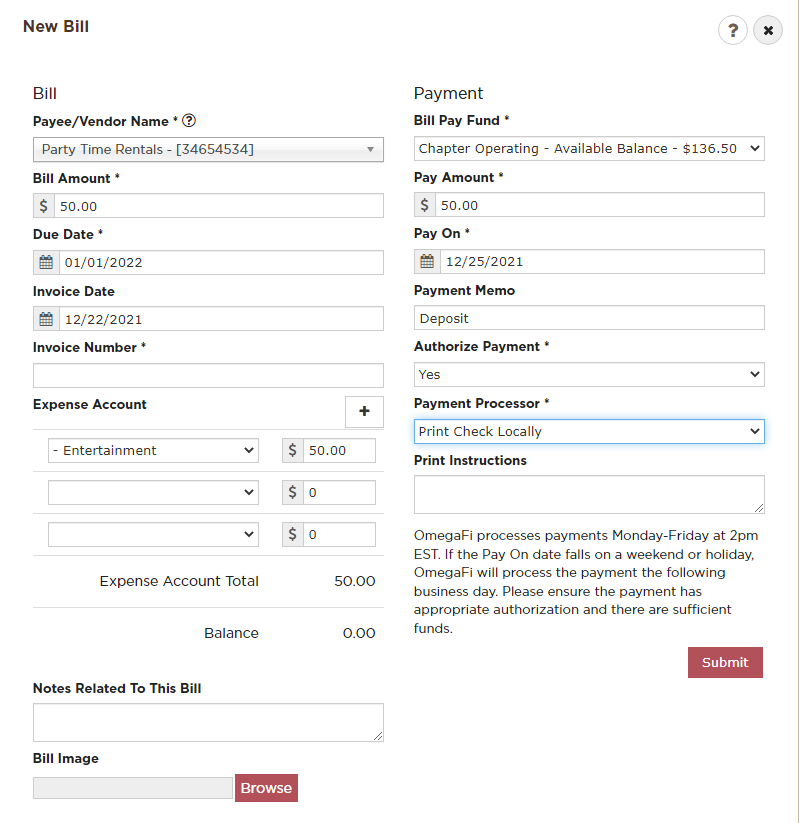
Next, complete the required fields on the ‘New Bill’ form:
- Payee/Vendor Name
- Person or company to whom you are paying
- Bill Amount/Pay Amount:
- Dollar amount of bill/payment
- Due Date
- Expense Account
- Once you select ‘Payee/Vendor Name,’ the vendor record’s assigned expense account defaults.
- To change the Expense Account, if necessary, select the appropriate expense account via the ‘Expense Account’ drop-down list.
- To split the expense among more than one expense, select the appropriate expense accounts and enter the appropriate dollar amount in the field next to the account.
- Once you select ‘Payee/Vendor Name,’ the vendor record’s assigned expense account defaults.
- Bill Pay Fund
- Select the appropriate Bill Pay fund
- Authorize Payment
- If the chapter requires more than one signature, each administrator whose permissions allow them to authorize payments must log in and authorize payment before processing will occur for the payment (locally or at OmegaFi).
- Payment Processor
- Select ‘Print Check Locally’
- Select ‘Submit’
- After submission of the bill, select ‘Print Local Checks’ within the Manage Payables menu. The check will display in the ‘Local Checks to Process’ section. Select the Power Icon to process the payment.
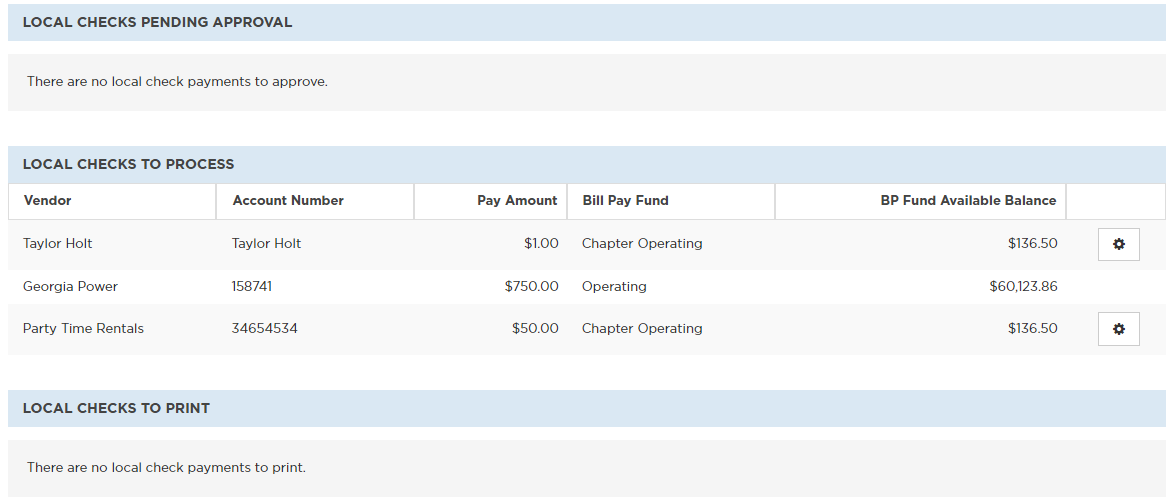
- The check will now appear in the ‘Local Checks to Print’ section. Select the printer icon to print.

- Once the check processes, the system deducts the check amount from the Bill Pay Fund’s available balance and records the entry in the appropriate Account Register automatically.
- Should a printing error occur, the user who created the check is able to reprint checks for two days following the original printing of the check.